
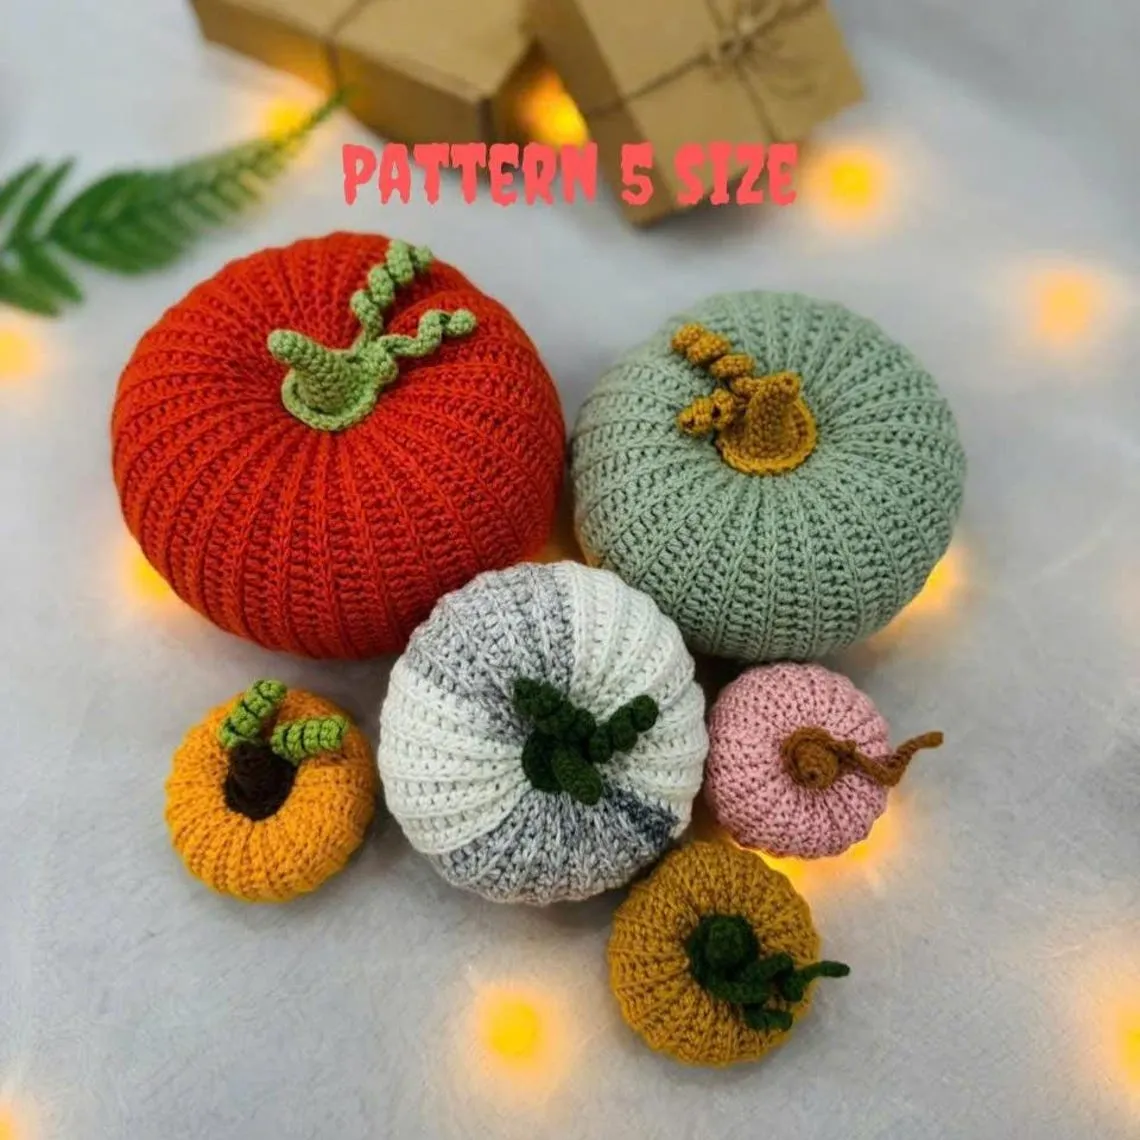
Crochet a whole pumpkin patch with this free pumpkin crochet pattern in 5 sizes! The ribbed texture comes from simple back-loop rows worked flat – no tricky shaping – so it's an easy crochet project for beginners and a quick win for experienced makers. Make tiny pumpkins for keychains and car charms, mid-size ones for your Halloween table, or a big 6-inch pumpkin as a cozy fall pillow.
Every pumpkin uses the same method: crochet a ribbed rectangle, sew it into a tube, gather both ends and add a curly stem and vine. Bookmark this page (or save it to Pinterest) and follow along with your hook.
Love Halloween and fall crochet? You'll find more detailed amigurumi patterns and ready-made pumpkins in my Etsy shop HandmadePhuongGifts.
Materials & tools
- Yarn: cotton-acrylic blend, approx. 1.5 mm (sport weight) – I used Susan's Family 4; YarnArt Jeans works the same. Thicker or thinner yarn gives a bigger or smaller pumpkin.
- Pumpkin colors of your choice (orange, sage green, white, pink, mustard…) plus green or brown for the stem and vine
- Hook: 2.2 mm (US B/1 – C/2) or the size that suits your yarn
- Long sewing needle, scissors, fiberfill stuffing, stitch markers, glue gun
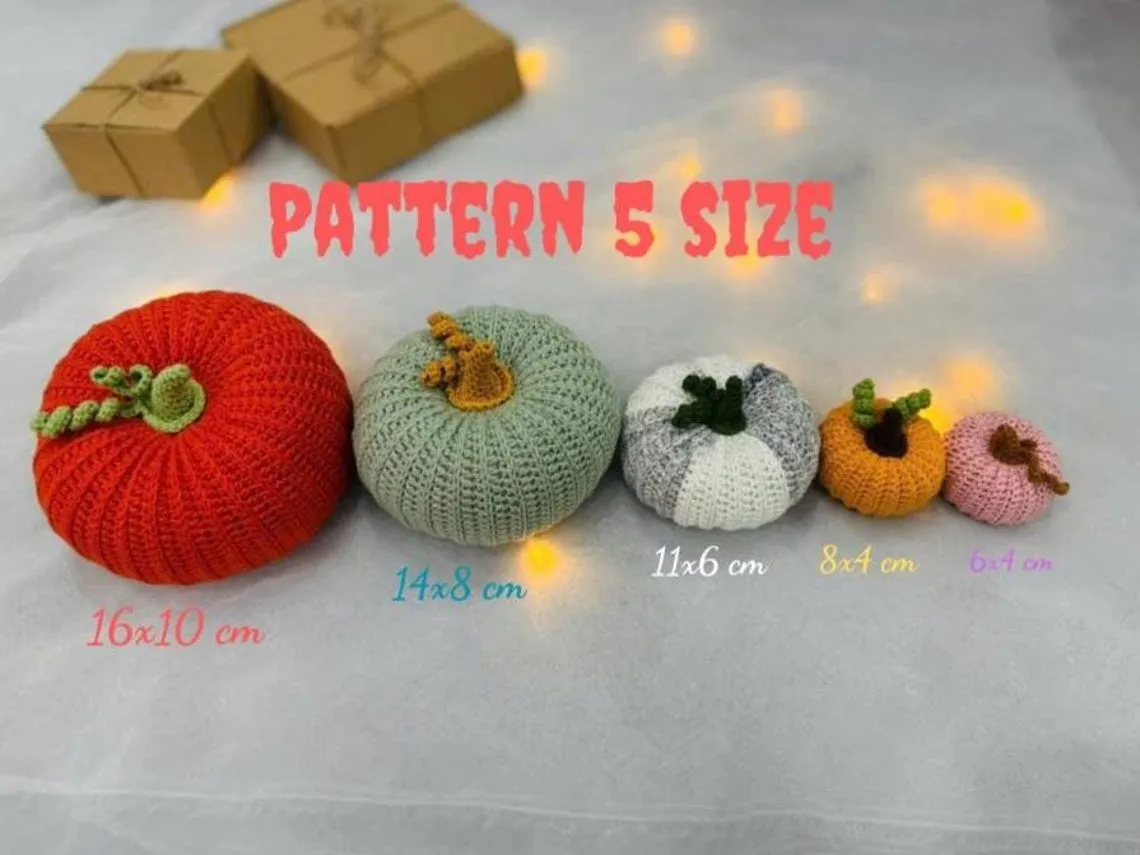
| Size | Width × height | Suggested use |
|---|---|---|
| XS | 6 × 4 cm (2.4 × 1.6 in) | keychain, car charm, ornament |
| S | 8 × 4 cm (3.1 × 1.6 in) | bowl filler, gift topper |
| M | 11 × 6 cm (4.3 × 2.4 in) | table decor |
| L | 14 × 8 cm (5.5 × 3.1 in) | centerpiece |
| XL | 16 × 10 cm (6.3 × 3.9 in) | pumpkin pillow, shelf decor |
Abbreviations
| Abbr. | Meaning |
|---|---|
| ch | chain |
| sc | single crochet |
| hdc | half double crochet |
| slst | slip stitch |
| inc | increase (2 sc in 1 stitch) |
| dec | single crochet decrease |
| MR | magic ring |
| BLO | back loop only |
| (…) × n | repeat n times |
The pattern uses US crochet terms.
How to crochet the pumpkin body
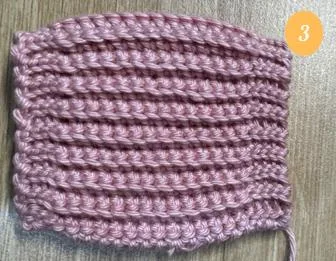
The body is worked flat in rows: at the end of every row, ch 1 and turn. Working in the back loop only creates the pumpkin ribs. The slip stitches at both ends of each row make the narrow, gathered top and bottom; the sc/hdc in the middle make the round belly.
Example – XS pumpkin (6 × 4 cm):
- Row 1. Ch 23, starting in the 2nd chain from the hook: 4 slst, 14 sc, 4 slst (22)
- Row 2–38. BLO: 4 slst, 14 sc, 4 slst (22)
Cut the yarn and leave a long tail.
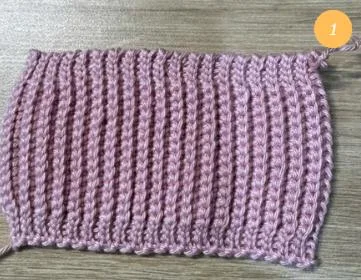
Body for all 5 sizes (ch 1 and turn after each row, every row after Row 1 in BLO):
| Size | Starting chain | Each row | Rows |
|---|---|---|---|
| XS 6 × 4 cm | ch 23 | 4 slst, 14 sc, 4 slst (22) | 38 |
| S 8 × 4 cm | ch 23 | 4 slst, 14 sc, 4 slst (22) | 42 |
| M 11 × 6 cm | ch 31 | 4 slst, 22 hdc, 4 slst (30) | 48 |
| L 14 × 8 cm | ch 41 | 5 slst, 30 hdc, 5 slst (40) | 54 |
| XL 16 × 10 cm | ch 49 | 4 slst, 2 sc, 36 hdc, 2 sc, 4 slst (48) | 62 |
Shaping the pumpkin
The finishing is the same for every size.
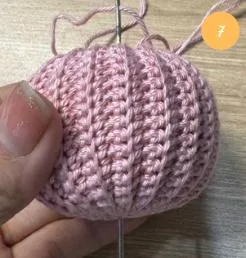
- With the long tail, sew the first and last rows together to make a tube. Fasten off but don't cut the yarn.
- Turn the tube inside out so the seam is hidden inside.
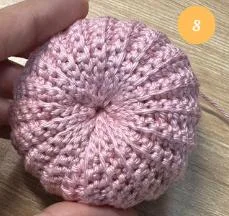
- With a yarn needle, weave along one edge of the tube – pick up 1 ridge, skip 1 ridge – then pull tight to close the bottom. Fasten off and cut the yarn.
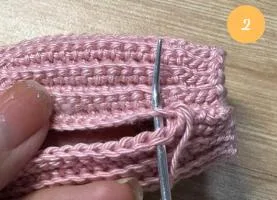
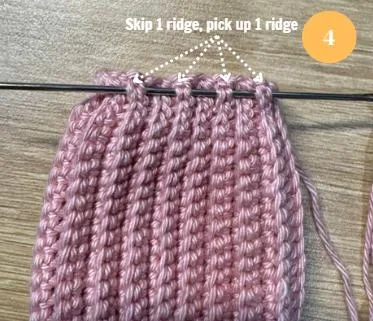
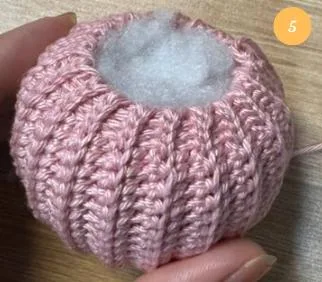
- Stuff the pumpkin and close the top the same way. Fasten off, don't cut the yarn.
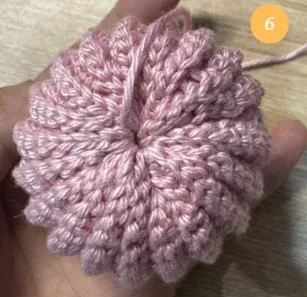
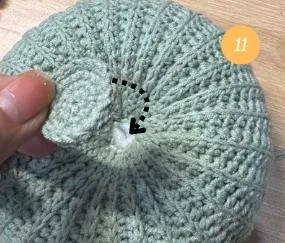
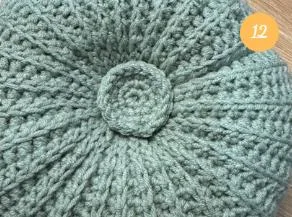
- Pass the needle down through the center and out the bottom, pulling gently so the pumpkin flattens into its classic shape. Fasten off and hide the tail inside.
Stem and vine
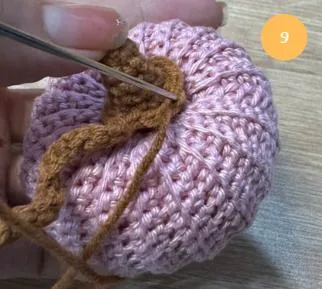
Work the stem in continuous rounds, then chain out the two curly vines in the last round. Sew the stem to the top of the pumpkin with the long tail.
XS and S pumpkins:
- Rnd 1. MR 5 sc (5)
- Rnd 2. 5 sc (5)
- Rnd 3. inc, 4 sc (6)
- Rnd 4. inc, 5 sc (7)
- Rnd 5. inc, 6 sc (8)
- Rnd 6. inc, 7 sc (9)
- Rnd 7. (2 sc, inc) × 3 (12)
- Rnd 8. 10 sc, ch 21, starting in the 2nd chain from the hook: (3 sc, inc) × 5, slst into the 11th st of Rnd 7; ch 13, starting in the 2nd chain from the hook: (3 sc, inc) × 3, slst into the 12th st of Rnd 7. Cut the yarn, leave a long tail.
The increases make the vines curl by themselves.
M and L pumpkins:
- Rnd 1. MR 6 sc (6)
- Rnd 2. 6 sc (6)
- Rnd 3. inc, 5 sc (7)
- Rnd 4. inc, 6 sc (8)
- Rnd 5. inc, 7 sc (9)
- Rnd 6. inc, 8 sc (10)
- Rnd 7. (sc, inc) × 5 (15)
- Rnd 8. 8 sc, ch 25, starting in the 2nd chain from the hook: (3 sc, inc) × 6, slst into the 9th st of Rnd 7; ch 17, starting in the 2nd chain from the hook: (3 sc, inc) × 4, slst into the 10th st of Rnd 7; 5 sc. Cut the yarn, leave a long tail.
XL pumpkin:
- Rnd 1–6. as for M and L (10)
- Rnd 7. 10 inc (20)
- Rnd 8. 20 sc (20)
- Rnd 9. 8 sc, ch 25, starting in the 2nd chain from the hook: (3 sc, inc) × 6, slst into the 9th st of Rnd 8; ch 17, starting in the 2nd chain from the hook: (3 sc, inc) × 4, slst into the 10th st of Rnd 8; 10 sc. Cut the yarn, leave a long tail.
Bottom nub (L and XL)
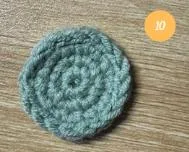
The bigger pumpkins get a neat round patch to cover the gathered bottom.
- Rnd 1. MR 6 sc (6)
- Rnd 2. 6 inc (12)
- Rnd 3. (inc, sc) × 6 (18)
Fasten off, hide the tail and hot-glue the nub to the bottom of the pumpkin.
FAQ
Is this pumpkin crochet pattern good for beginners?
Yes – it's one of the easiest crochet pumpkin patterns. You only need chains, slip stitches, single crochet and half double crochet worked in rows, plus simple sewing. No increasing or decreasing on the body.
How do I make a crochet pumpkin keychain?
Make the XS pumpkin (6 × 4 cm / 2.4 in), stuff it firmly and sew a keyring or lobster clasp under the stem. It also makes a cute car charm or Christmas tree ornament.
Can I make a bigger pumpkin or a pumpkin pillow?
Yes. Use the XL size with chunky yarn and a bigger hook – the pumpkin grows with your yarn. With 1.5 mm yarn the XL is about 6.3 in wide; with bulky yarn it becomes a soft pumpkin pillow for fall decor.
What can I use crochet pumpkins for?
Halloween and Thanksgiving table decor, fall wreaths, bowl fillers, teacher gifts, craft fair sales and baby photo props.
Your pumpkins are ready!
Congratulations – your pumpkin patch is finished! If you have any questions, send me a message – I'm always happy to help, and I'd love to see your pumpkins. Tag @pt254297 on Instagram or Pinterest.
Looking for more spooky crochet? Browse my Halloween crochet patterns and the free Dandy's World patterns Pebble and Sprout. You'll find more amigurumi patterns – or ready-made pumpkins if you'd rather not crochet them yourself – in my Etsy shop HandmadePhuongGifts. Favorite the shop to be the first to see new patterns.
This free pattern is for personal use. Please don't republish, resell or translate the pattern itself – share a link to this page instead. You're welcome to sell the finished pumpkins if you credit HandmadePhuongGifts as the designer.